Showing posts with label polish. Show all posts

Monday, April 21, 2014

Colors By Llarowe: Bea Stings! for Easter!


Heya guys!


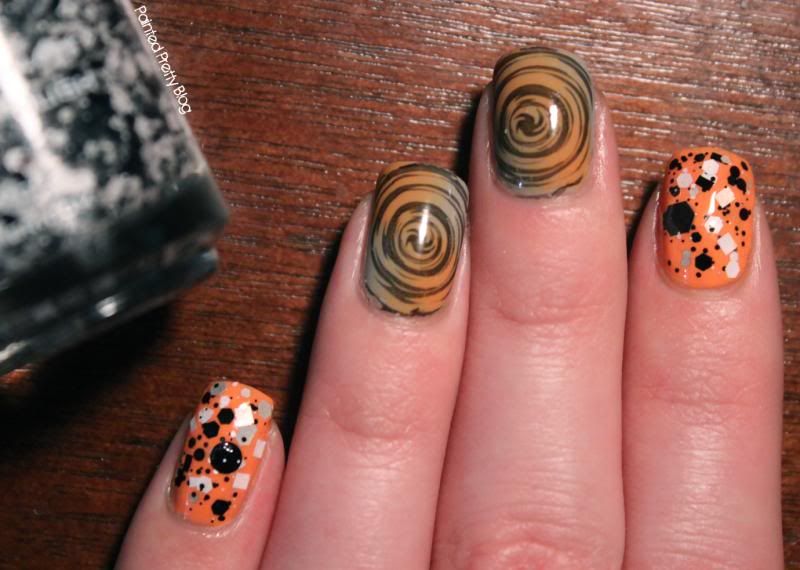
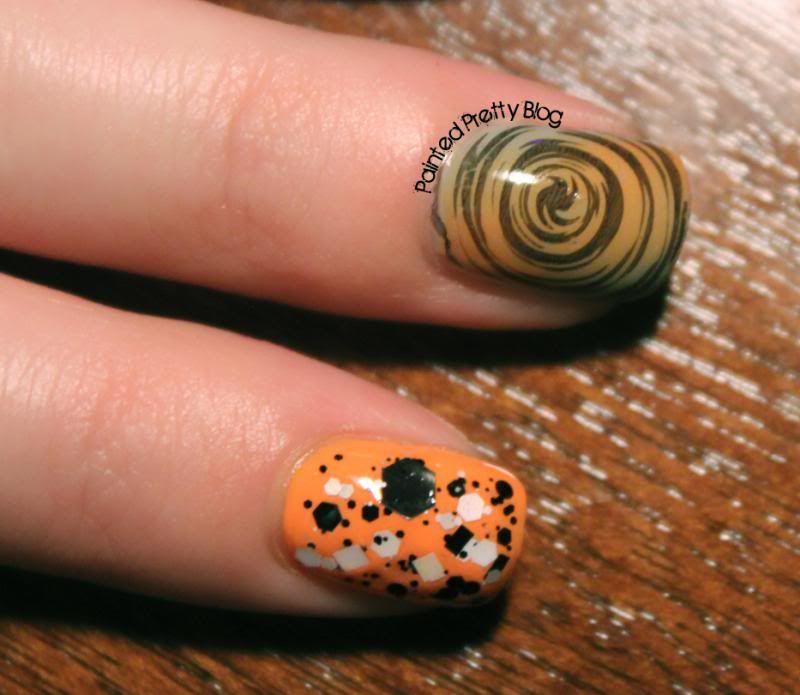
I really wanted to show you all what I threw together for Easter, this past weekend. I recycled  last week's mani  into a  cute, if unconventional, Easter mani. The reason I say unconventional, is because the colours, aren't your typical colours since they are a far cry from a pastel nail colours.


Colors-By-Llarowe-Bea-Stings!-Swatch-Easter-Nail-Art-1-water-decals


Colors-By-Llarowe-Bea-Stings!-Swatch-Easter-Nail-Art-2-water-decals


Colors-By-Llarowe-Bea-Stings!-Swatch-Easter-Nail-Art-3-water-decals


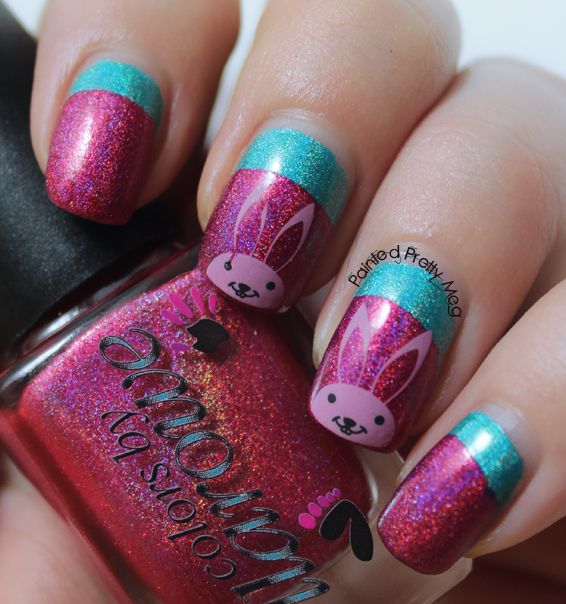
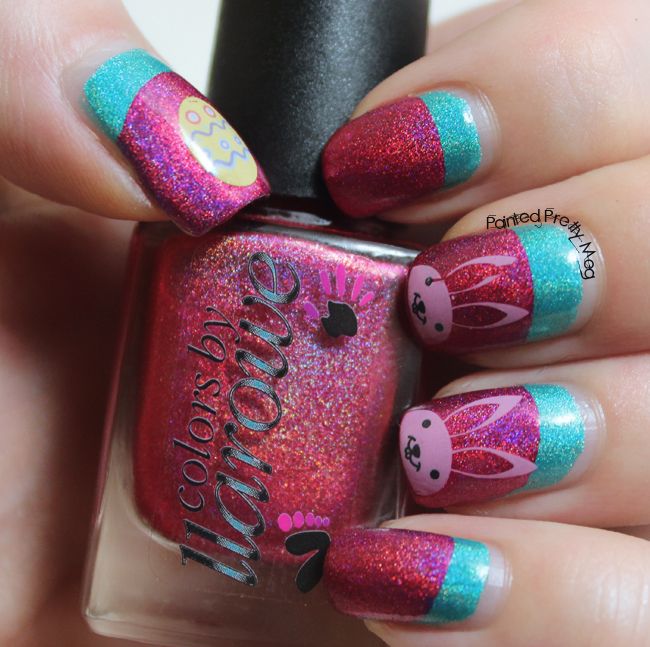
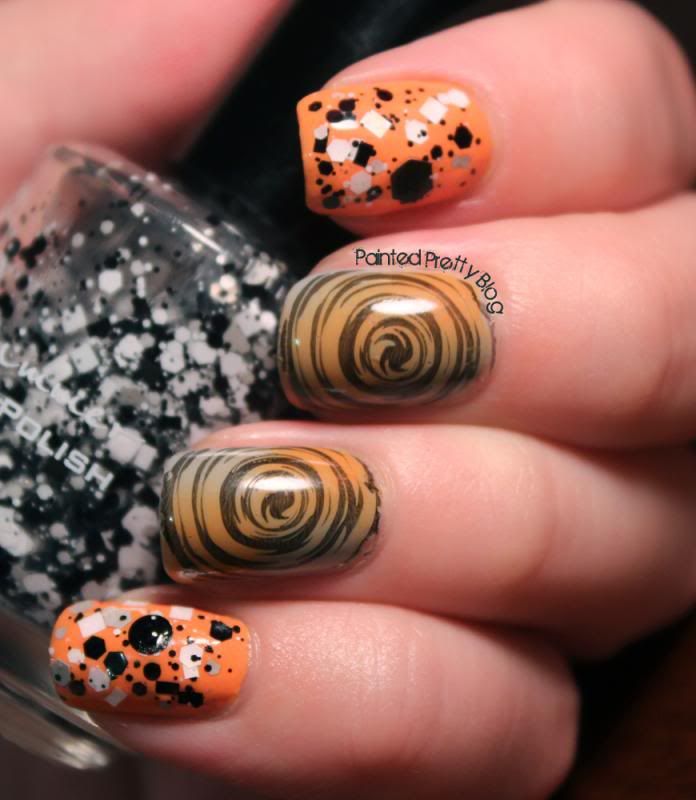
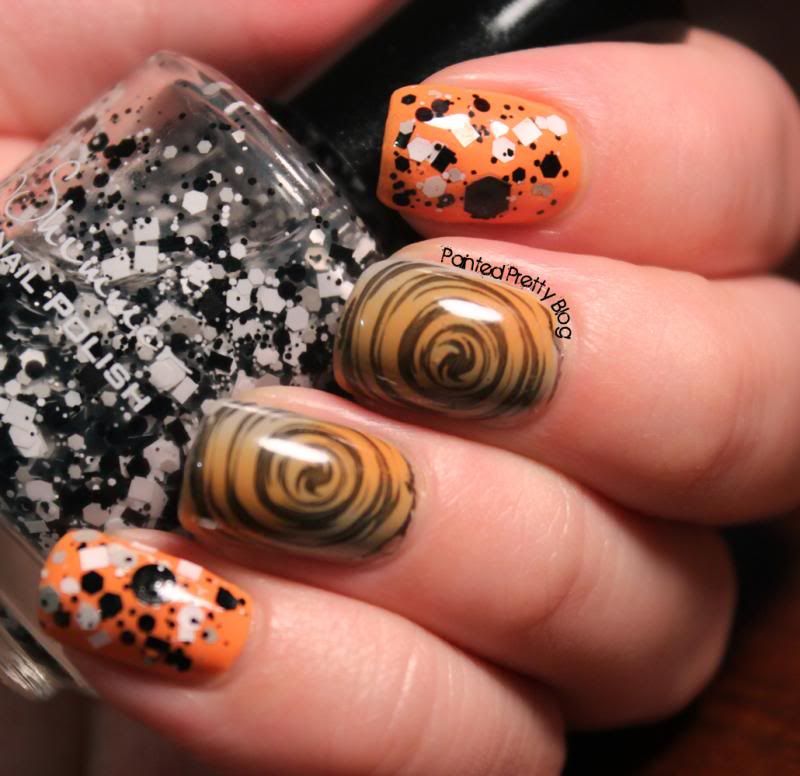
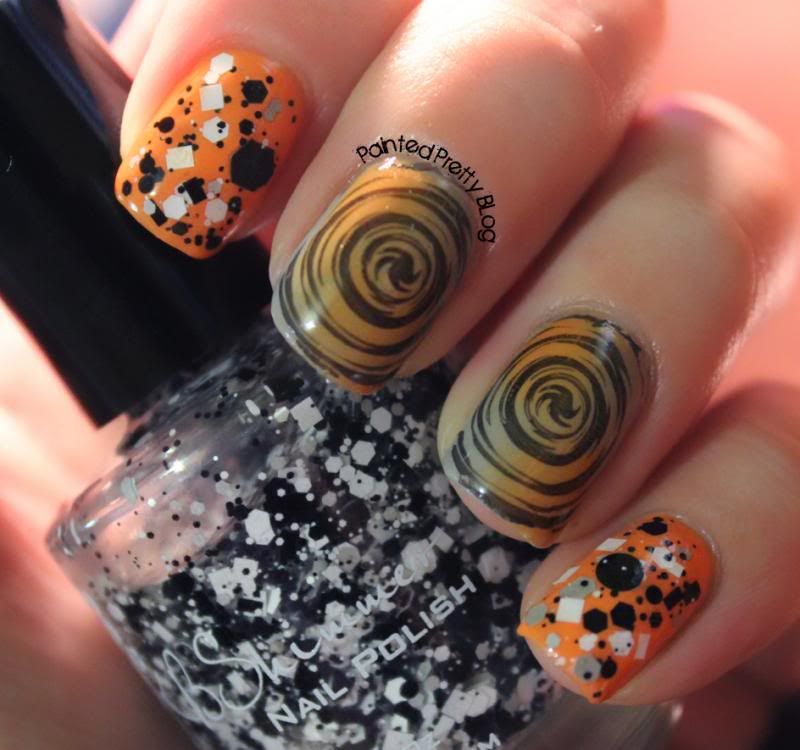
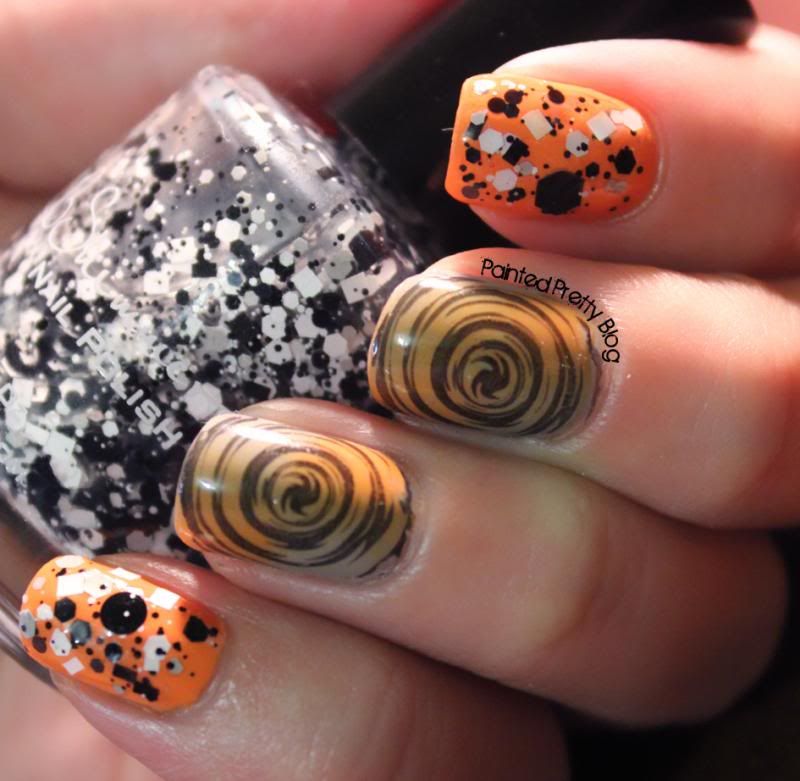
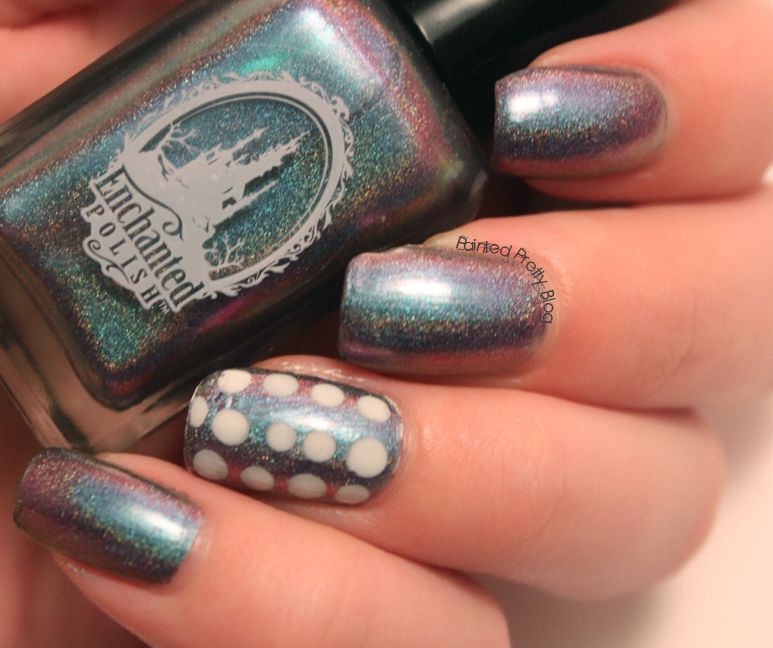
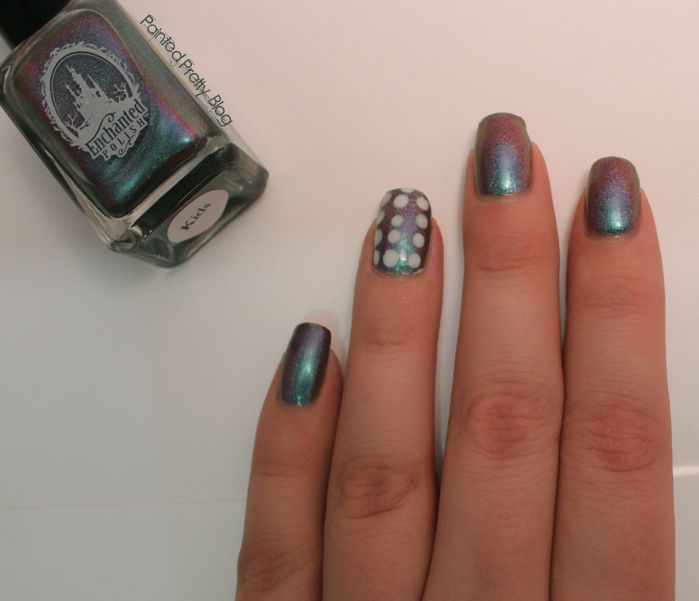
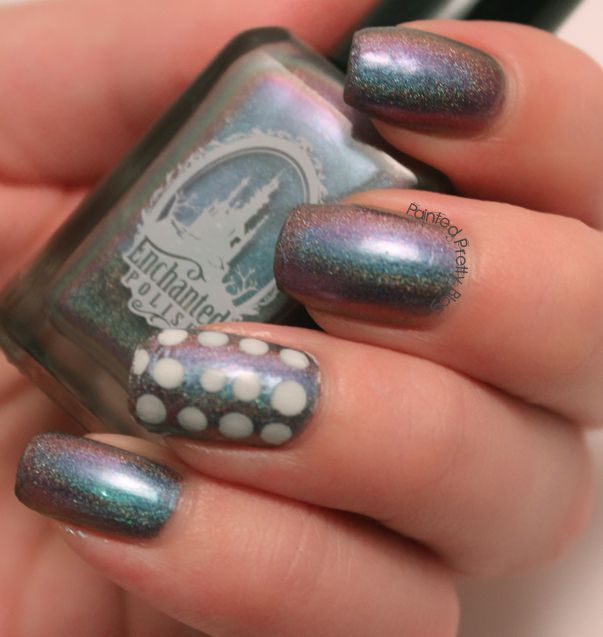
To get this look, I simply used Nail Vinyls, at the half moon section, and painted my nails in Bea Stings! by CBL. I honestly can't say enough good things about Bea Stings!, the colour is super rich, the holo is so intense, it almost looks like a rainbow flame on your nails. It is jaw dropping. It was a tad thick, but still super easy to work with. I honestly, have yet to meet a CBL polish that I don't love. It has very quickly become a favourite brand, and I can't seem to get my hands on enough of them. Once that was mostly dry, I took out the water decals, from Born Pretty Store, and placed them on the nail, then top coated with a quick dry top coat, and I was done!

Although this is not your typical colour scheme for an Easter mani, like I said before, I really love it. I think the different twist makes it stand out, and makes it a bit unique in a sea of Easter mani's. It was my way of celebrating since this year our household didn't do much for the holiday, flu's, a sinus infection (me), and a bout of pneumonia (my mother), kept everyone wanting to just relax and take it easy. I can say that finally we are both starting to feel like ourselves again and things should be back to normal in a few days, which I can honestly say we are both so ready for.

Alright guys and gals, I think that covers it for today. I really hope everyone had a great holiday, or if you don't celebrate, then a great Sunday. Till next time Kittens! <3

Tuesday, October 29, 2013

Zoya Arizona, Zoya Dove and KBShimmer Greyscale, Halloween Get Together.


Hey Guys!!


It is almost Halloween, and so I thought it was probably a good idea to get a  festive Halloween mani up on the blog! I love Halloween, I find it to be such a fun holiday! Plus, Halloween is candy, candy, candy and I have a borderline addiction to all things candy! So Halloween and myself are pretty tight!


I had tons of fun doing this, like I have mentioned many, many times before, I am still fairly new to the nail world, so this was my first Halloween inspired mani! I really like how this turned out. It is fun, crazy and festive, which for me is just perfect for Halloween.


Isn't it fun looking!? Sadly, I am not doing much for Halloween this year. It seems to be one of those years, where I ask around if anyone wants to do anything fun, and everyone says "Nah, I think I will just stay in this year"  At least I can celebrate with some bad horror flicks and my festive mani though! 

To get this look, I started with a base of Zoya - Arizona on my thumb, pointer and pinky fingers, and a base of Zoya - Dove on my middle and ring fingers.  I let that dry a bit, then took out KBShimmer - Greyscale, and put it over the fingers with the orange base.  There was a bit of glitter placement since the glitters are so large, but nothing major. That glitter topper applies pretty effortlessly.  Then I took out a sponge and added Zoya - Dove and Zoya - Arizona in a checkered like pattern, and sponged that onto my middle and ring fingers. Once that was dry (sped up with a quick dry top coat)  I took out Bundle Monster Plate BM-415 and stamped the image onto my middle and ring fingers, and voila! I was done!

This mani didn't take to long to do, especially now that I am starting too really improve with my stamping skills. It is, and has been an awesome learning experience, and I am not perfect yet, but I am getting there! I am really enjoying watching my progress happen with stamping. It is neat to see myself grow and learn with it.

Alright guys and gals, I think that pretty much covers it for one day.  Even though I am not doing much for Halloween I am still really looking forward to it. Do any of you guys have any awesome fun Halloween plans? I know aside from bad horror flicks, Rocky Horror Picture Show will be on my list, how can it not be!? It is THE Halloween movie!! :P Anyway, till next time Kittens. 


Tuesday, October 1, 2013

Enchanted Polish: Kids, Swatches with a Sprinkle of OPI: My Boyfriend Scales the Walls


Heya Guys!!

I know I promised no more then a week without a post, and here I am a day late, but like I said before, things have been rather hectic for me lately, so it has been hard just keeping up with 1 a week :l Just this week alone, I have my  roommate moving out, and across the country, and puppy surgery  (nothing to serious, just getting one of my dogs fixed, one of his "boys" never descended, so it is abdominal surgery unfortunately though) :l  The sad part is, these aren't even the most eventful things to happen to me in the last few weeks! The good news is, that things should be getting back to a more normal pace after this week, so this posting fail should stop after this week! Just bare with me a tiny bit longer guys!!

Anyway, like most days in the past couple of weeks, I am short on time today so I will make this short. If you follow me on instagram, you already know, I recently got my paws on a couple of Enchanted Polish, polishes.  Today, I am showing off one of the colours I got! I didn't get all the "hype" around this brand, till I tried it for myself.  Honestly, there are NO pictures, that really, truly do this brand justice. You are just going to have to take my word for it.. This brand is SO worth all the hype!!  This mani features  EP Kids, with a bit of OPI - My Boyfriend Scales the Walls....


Isn't it just amazing!??? There is so much going on in this polish..I don't even know where to begin!! The holo awesome, the duo-chrome,...the depth of the polish is simply stunning, not to mention the flawless, easy application. I got so many compliments when I wore this.. Simply put, I think everyone should have at least one Enchanted Polish in their stash...You won't regret it! I swear!!

Alright guys and gals! I know there isn't much to it here, but I hope you liked it anyway, and if everyone wants to think good thoughts for my puppy on Friday, that would be totally awesome of you!! Till next time kittens!!


Monday, September 16, 2013

OPI Haven't the Foggiest with OPI Black Onyx Halfmoons

Hey Guys!

It's been a whole week! Wow, how did that happen!? To make it worse, I have had this mostly ready to go  for a few days, but with work, and some real life stuff getting in the way.  I haven't had a chance to post it. I actually, don't even have time today, since I should be getting ready for work, but this sounded like more fun anyway. Plus, I refuse to go more then a week without posting, I know the 4 people who read this look forward to my posts! haha..

Okay, since I am short on time,  I will get right to the pictures, my last few posts have been to wordy anyway. :P I wore this a few days back.  Simply put, I loved it. Which was weird, cause as it was coming together on my nails, I didn't, not at all. It even, almost, got taken off before I finished a couple times. I am really glad I didn't give into the urge though, cause it came out awesome.

Alright, time to judge for yourselves, not too harshly though!!


Sunlight.


Sunlight.


Indoor shot.


Sunlight.


This was a bit of a learning experience. I am not sure if it was just me, or if black is notoriously hard to photograph, but I had a lot of trouble getting the images to come out clear and concise, and not having the black blend into other things, shadows, the bottle handle, etc..I will keep working on it though!

Speaking of photo's, I have now,  finally!! built a light box, (yay!!) so that should help tremendously in the quality of my photo's.  This is all a huge learning process, that is for sure! I feel like, I am improving though, week after week, learning my craft, and not sucking quite as much as the previous week! Maybe, one day I will have pictures I don't find a ton of flaws in! 

A little something to note before I finish off this post. I adore Haven't the Foggiest. It goes on like a total dream. I had read previously about how nice this polish applies, but it was even better then I expected. No brush strokes, smooth, not to thick. It was a-maz-zing!  I have been mostly meh about the mainstream fall collections, but this shade has won my heart. If you haven't gotten yet, I highly encourage you to pick it up.

Anyway, I hope everyone had an awesome weekend. I had to work, but only on the Saturday, so it was still a pretty decent weekend. Till next time kittens <3


Friday, August 23, 2013

Zoya PixieDust: Nyx Swatches and Review

Hey Guys!!

I was hoping to have this out a few days back, but I had some epic computer fail. Hardware fail of my motherboard, to be exact. Needless to say it required the replacement of my laptop, so I got a bit delayed in getting this up. Better late the never though right!?? Anyway, let's get right into the good stuff, since it still frustrates me to no end, that a 1 year old laptop died on me. :l

Back when I posted about London here I mentioned that I also bought Nyx. Which is a periwinkle blue from the PixieDust collection. As you can guess, today’s post features the swatches and review of that texture polish.


Nyx is a gorgeous almost magical soft blue, with what feels like an actual twinkle thanks to the PixieDust effect. I found this to be a much softer polish colour then London. Where as London almost said fairy tale goes punk. This just speaks true innocent fairy tale magic. (At least to me!) As with London I wore it without base or topcoat. Anyway, I will save the particulars like last time till the end, onto some pictures!!


Such a soft, magical shade!


Close up, of the actual polish.


Okay, now you have seen the images, and heard my description of it.  Time to talk about the polish. First off, it went on amazing, just like London. It is a bit on the thicker side, but not so much that it makes it difficult to apply or work with. All the texture polishes I have tried have been on the thicker side, I am almost certain that it is just a side effect of texture. The wear time was also really well, unlike with London which only got 1 day before I took it off. I wore this for almost 5 days before the first slight chip, before that the only thing I experienced was some minor tip wear. Overall I liked this polish a lot, and will certainly be wearing it again. If I had to pick between this and London, even though they are both beautiful.  I would likely have to pick Nyx. I guess I have a soft spot for it's fairy tale, dream like quality!  

I think that covers most of it. A quick little question though, I have been less than impressed with the lighting of my images, and I heard that natural light, light bulbs are best? Is this true? I am thinking about picking one up and seeing if it helps any.  I have also considered building a real light box, but haven't had much spare time. It is on my to-do list though!! Any advice, anyone wants to give to a newborn blogger like myself would be greatly appreciated get you tons of love! Well, till next time kittens...

Monday, August 12, 2013

Nailart: Rainbow Galaxy Gradient with China Glaze Fairy Dust.

Hello All!

I have decided I am in love with Essie - Tart Deco,  yup, totally and completely, hopelessly in love with it. Every time I decide to do my nails,  that polish always seems to end up in my hand. Sometimes it sneaks in there without me even knowing it. It's alright though, since the shade is gorgeous. If you don't own it, you should go buy it, right now! hurry! You are missing something in your life by not owning that shade!


So now that you all know about my love affair with Tart Deco, I guess I should get onto the point of my post! I recently decided to do a gradient of a mix and mash of colours. I had originally planned on a rainbow gradient, but as I got started, I kinda changed gears and ended up with something a bit different. It is "rainbow like" but it turned out to be more of a rainbow galaxy instead.

Now please be kind! I am still very new to nail art and gradients, and although this isn't perfect by any means. I think I did pretty good, and I really like how it turned out. Anyway, enough procrastinating, onto the images!!


Outdoor in the sun!


So there you have it!  Now, I know that it doesn't look very coral-ey. You are likely thinking.."You went on and on about Tart Deco, and it isn't even in there!"  I assure you,  it is! At the top of the nail. It just matched so well with the pink I used, that my camera refused to pick up any of the slight colour shift that is visible in person. 


I think that pretty much covers it for today, and I hope that the 2 people seeing this, like my attempt at "nailart".  I really hope some more people show up soon! **crosses fingers**  If no one does, at least I am archiving my nail polish addiction! :P Till next time kittens!

The polishes I used for this were:
                                                 OPI - Alpine Snow (Under the gradient)
                                                  Essie - Tart Deco
                                                  Essie- Play Date
                                                  Zoya - Micky 
                                                  OPI - Can't find my Czechbook
                                                  China Glaze - Fairy Dust


Monday, August 5, 2013

Nail Art: Fan Brush Technique and Dotted Thumb with KBShimmer What's Your Damage Accent.


Hey guys! or more accurate, the 2 people who I make look at this!


For my second post,  I decided to pull a picture out of my banner, since that image doesn't  do it nearly enough justice. I also  wanted something a bit more vibrant and colourful. Nails that express me a bit better, and this manicure was practically screaming my name. While I do love understated and simple. Most of the time, I am a very loud, colourful type of person.

 Now, I am still very much a newborn when it comes to nail art, so this wasn't perfect by any means, but overall, I was very happy with how well it turned out. Since other than the dots on my thumb, it was my very first time trying the fan brush technique.  I loved it so much in fact, that I wore it for about 4-5 days before taking it off. Alright, enough explaining it, time to show it off!

Not perfect, but I still adore it!!


Blurry image fail, but I still adore it!!

Random bottle image of  KBShimmer - What's your damage..which by the way, I love love love!


So there you have it!! Some of the images aren't the greatest, but a lot of these were taken as quick pictures to show a couple of people. I promise, that the image quality will improve!!  I just adored this manicure so much, that I felt I simply had to share it. Failboat images and all!

One thing I wanted to also mention quick, was how amazing What's Your Damage truly is, not only is it a gorgeous unique polish, but the formula is amazing. It goes on like a total dream and no fishing for the larger glitter pieces at all. I do however stand my bottle upside down before application to ensure the larger glitters aren't sunk to the bottom, but still no fishing!! 

I think that pretty much covers it. As an added bonus, the polishes I am wearing in the random KBShimmer bottle picture, are  Essie - Tart Deco and China Glaze - Highlight of My Summer. I was actually so excited when What's Your Damage arrived in the mail, that I pulled  it out and snapped a picture and proceeded to send it too way to many people in my contact list!  Anyway, till next time kittens!


The polishes I used were:
                                           Index and middle - KBShimmer - What's your Damage
                                           Ring,  pinky and thumb  - KBShimmer -  Don't Pink Twice                                                                                and China Glaze - Highlight of My Summer.


Saturday, August 3, 2013

Manicure - Nubar Black Polka Dots over OPI Skull and Glossbones

So, my very first post! I feel like there is a lot of pressure to make a great  first impression, and I normally fall flat on my face when put on the spot, so this is a bit nerve racking for me! Although chances are no one will even see this, so I guess it doesn't really matter when you think about it! :P

  After some thought, I decided on something simple for my first post. I wanted to be loud and exciting, make a statement, make myself stand out, but that fear of falling flat on my face kept me thinking simple and safe.

  This is a manicure I wore a little while back. I think about a month or so ago, and although I am enjoying summer and neon's and everything bright and sunshine filled that comes with it. I did adore this manicure when I had it on. There was a simple elegance about it that I simply loved.  Plus as an added bonus it was SO simple to do!

  Now, the indoor photos were taken with my T3i,  however the outdoor ones were sadly snapped with my iphone camera, I apologize in advance for their less than stellar quality.

 First up, the indoor photos.


Love the polka dots!


 Here are a couple of outdoor shots, with the trusty iPhone camera.


I love the matte effect with this look!


Okay, so there you have it! I hope I didn't disappoint or bore you all too badly!!  I promise to make my second post a bit more exciting. I love colour, especially bright loud obnoxious colours! 

 The polishes used to achieve this look were:

OPI Skull and Glossbones
Nubar Black Polka Dot
OPI Matte Top Coat.