Friday, May 2, 2014

It is Finally Colors By Llarowe Tank Tops and Flip Flops Weather!


Hey Guys!


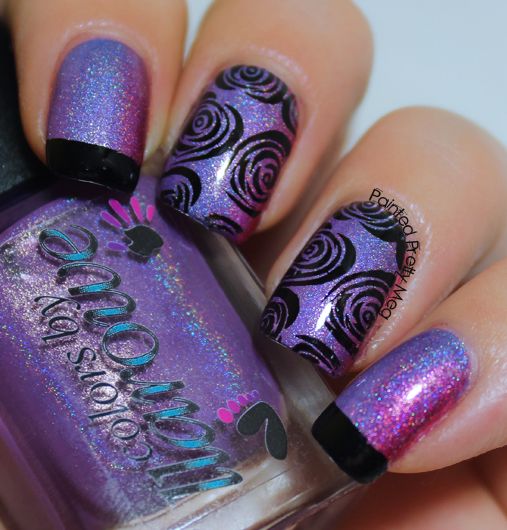
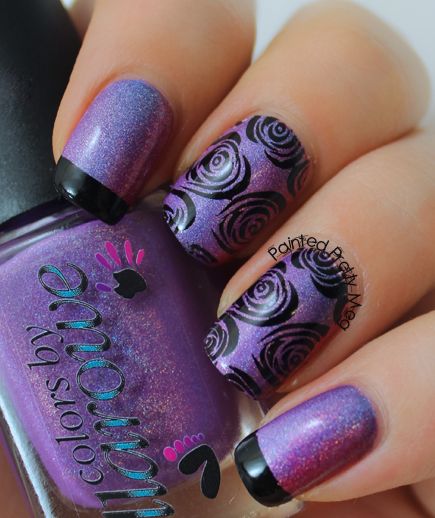
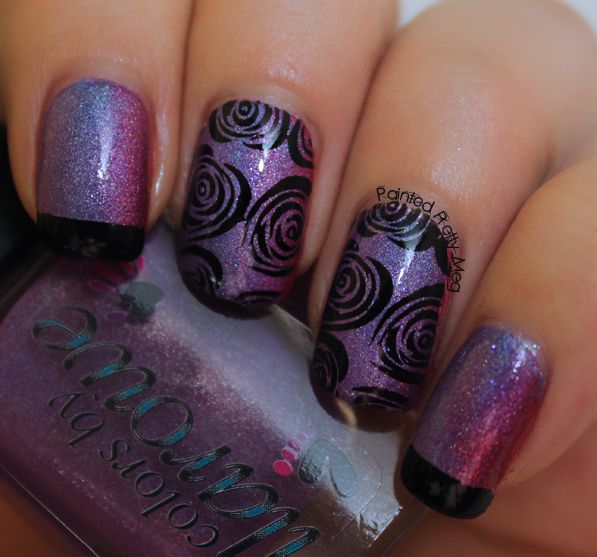
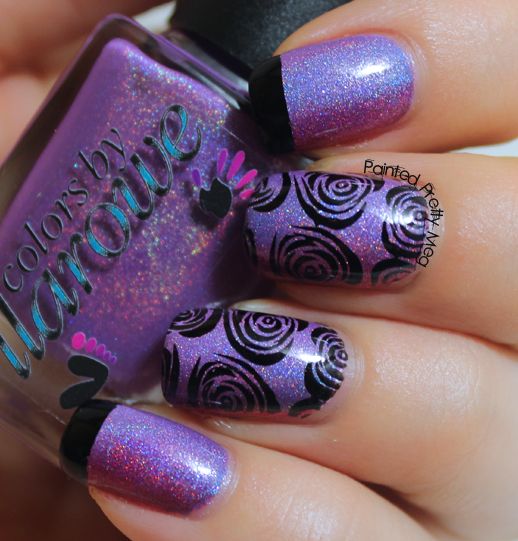
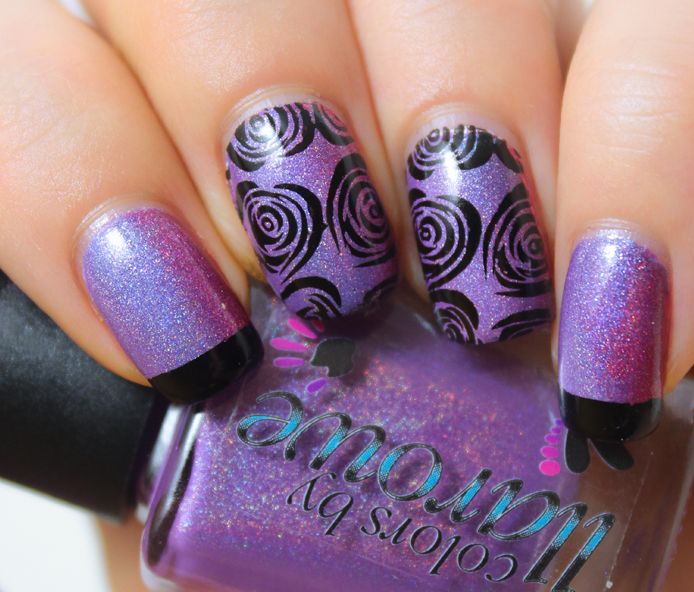
Happy Friday! Oh, and of course Happy May! Today I have for you, a holo gradient, with some MoYou London Stamping. I used 2 Colors By Llarowe polishes, and a Cirque Colors polish for this look. I really wish I had remembered to snap a picture of this gradient, before I stamped over it, but alas, I forgot (sorry).
Colors-By-Llarowe-Tank-Tops-And-Flip-Flops-Swatch-Moyou-London-Pro-Plate


Colors-By-Llarowe-Tank-Tops-And-Flip-Flops-Swatch-And-Nail-Stamping-Moyou-London-Pro-Plate


Colors-By-Llarowe-Tank-Tops-And-Flip-Flops-Swatch-Review-Moyou-London-Pro-Plate


Colors-By-Llarowe-Tank-Tops-And-Flip-Flops-Swatch-Review-Moyou-London-Pro-Plate


Colors-By-Llarowe-Tank-Tops-And-Flip-Flops-Swatch-with-Moyou-London-Nail-Stamping
Low Lighting,  still so gorgeous!


As always, I want to start off by saying, my light box didn't do the holo on this justice! It is much stronger in person.  I was hoping to nab some outdoor shots, but it has been nothing but rainy and overcast the past few days, so such is life. I also wanna say sorry for the picture spam, I just love this so much, that I ended up with way too many pictures, and this was as much as I could narrow it down!

 For this look, I started off with a base of Cult Nails Tempest.  I then sponged on, in a diagonal line from left to right. Colors By Llarowe Tank Tops and Flip Flops, Cirque Colors Sky Woman, and Colors By Llarowe Lucy I'm Home. Lucy I'm Home came out a lot more pink, then coral, when sponged on this way, but I can't say that I mind at all really, since it looks really pretty in this gradient. I waited for my nails to fully dry,  I did not use top coat here, since I didn't want to use to much, and dull the holo effect,  once it was dry, I stamped over the gradient with MoYou London Pro Plate 10, in Cult Nails Nevermore on my middle and ring finger. I used Nail Vinyls on my pointer, pinky, and thumb and did the tips in Nevermore as well.  Then I top coated, and voila gorgeous mani!

This came out even better, then I thought it would, and I couldn't be more pleased with the end result. I really love that the blue glitters in Sky Woman really show up in this mani, and that the colours blended so well, that it almost has the look of a duo-chrome, since depending on the light, and the angle of my hand, the colours seem to almost shift.


I think this is the perfect mani, to bring in May. Holographic, flowers, and bright! I honestly, can't believe it is  here already,  not that I am not ready for the warmer temperatures, it is just that it feels like it was just March, and now  bam! May is here, however, being sick with a nasty sinus infection for most of April, may have added to my shock of it! :P  Has anyone else got the holo bug that I seem to have lately? I think it was the long winter, and the promise of summer on the horizon that has me wanting all the holos!

I think that mostly covers it for today guys and gals. I hope everyone has a great weekend, and of course great weekend mani's! Till next time Kittens! <3

Tuesday, April 29, 2014

Cirque Colors Sani Swatch with the illusion of Stamping!?


Heya guys!!


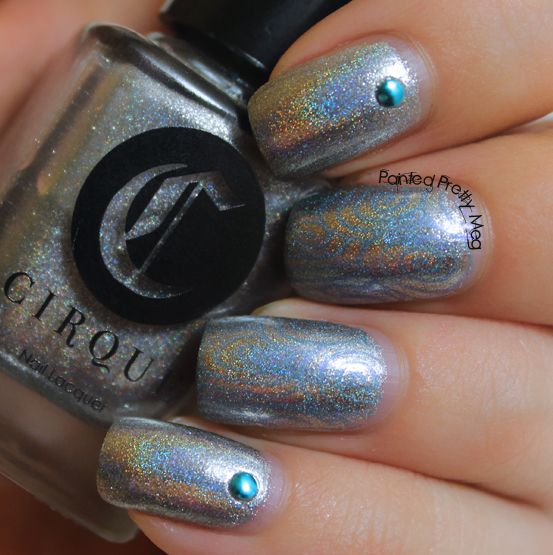
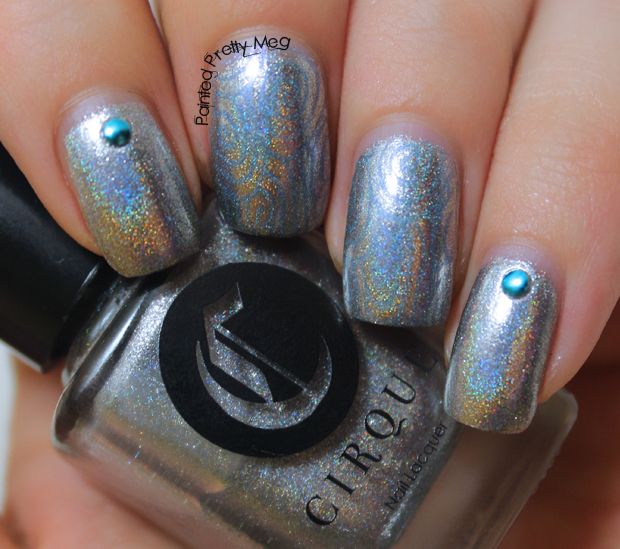
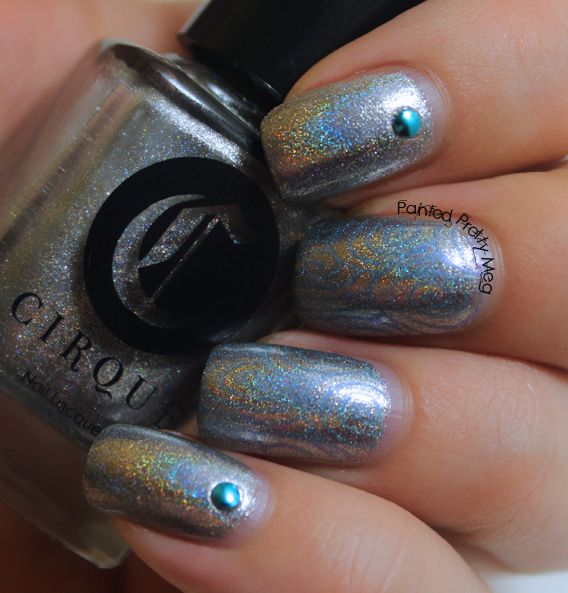
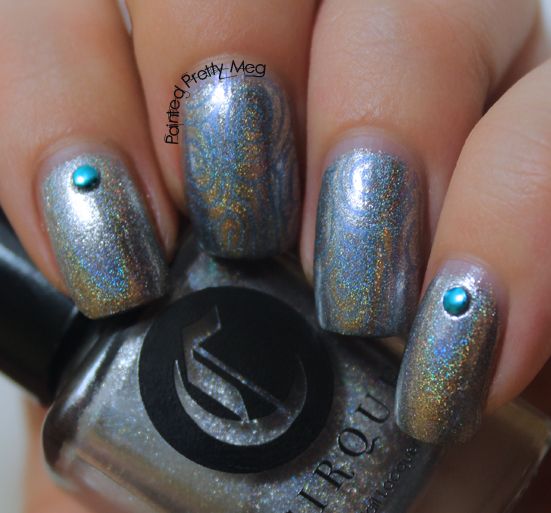
Today I have something that didn't come out quite as planned, I wouldn't go so far, as to call it a nail fail, but  it wasn't what I intended either!  I started this off, wanting to wear Cirque Colors Sani. It is a gorgeous silver holographic polish, that is also a silver foil.  It is part of the new Heritage Collection, and I love it almost as much as I loved Cerrillos. It has an almost oil spill like rainbow effect to it at some angles, and at others it is a in your face rainbow. It has a ton of depth, and I can certainly see myself wearing it over and over again.


Cirque-Colors-Sani-Swatch-and-Review-1


Cirque-Colors-Sani-Swatch-and-Review-2


Cirque-Colors-Sani-Swatch-and-Review-3


Cirque-Colors-Sani-Swatch-and-Review-4


As you can see, if you look really close, I attempted some stamping over Sani, however, the polish I picked, which is Mentality Polish: Deuce, was a bit to close in finish, and not quite dark enough to show up like I had hoped. It still looks really nice, a very almost not there subtle stamping effect, like you might have to look twice to see it, an illusion of stamping, if you will,  but I wasn't going for that when I started, so I might have to try this again, with a darker colour. I will also add here, that Mentality Deuce was not the problem. Deuce is actually from the stampers collection, and it stamps wonderfully, and is super opaque, I just picked the wrong colour as my base! 


Even though, this wasn't quite the look I was going for, I still really enjoy it, and I love, love, love Sani, so it still counts as a win in my book! I am pretty certain actually, that I am going to be head over heels for the entire Heritage Collection, cause I fall hard all over again every time I wear a new colour. If you are looking for a super unique Silver holo polish, this just might be it. I certainly don't own anything even close to Sani in my collection, the foil quality, makes it incredibly unique.


Alright guys and gals, I think that covers it for today. Have any of you, ever had a plan for nails when you start, and even though it doesn't work out, you end up loving it just the same??  Do you have a favourite from the Heritage Collection? Have you picked up Sani? Let me know in the comments! Till next time kittens! <3


Friday, April 25, 2014

KBShimmer Full Bloom Ahead to Wonderland!


Heya Guys!


Recently I re-watched Alice in Wonderland for the millionth time, and it was during that movie that this mani was inspired.   Anyone who has seen the movies previously, likely remembers these flowers.


When I was a kid, these were by far one of my favourite things in all of Wonderland, not that the broom dog, wasn't awesome too, cause well, broom dog, but I just loved the vibrant colours and unique shape, of these flowers, possibly the flowers being able to talk and sing, might have added to my interest in them. Either way, when I re-watched that movie, I couldn't help but think to myself, "How have I never done these flowers on my nails before!?"  


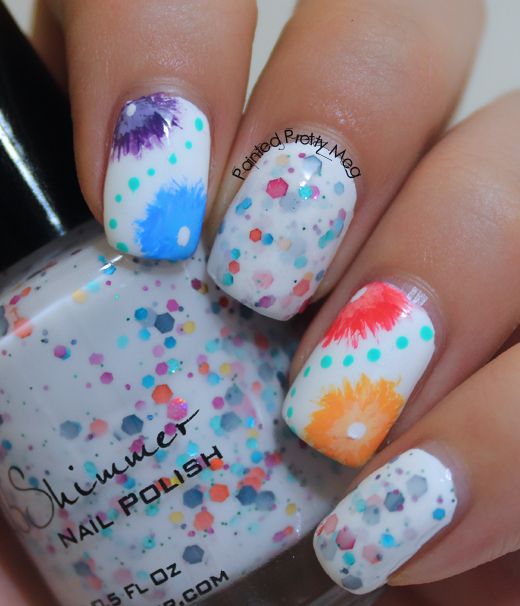
KBShimmer-Full-Bloom-Ahead-Swatch-with-Floral-Nail-Art-1


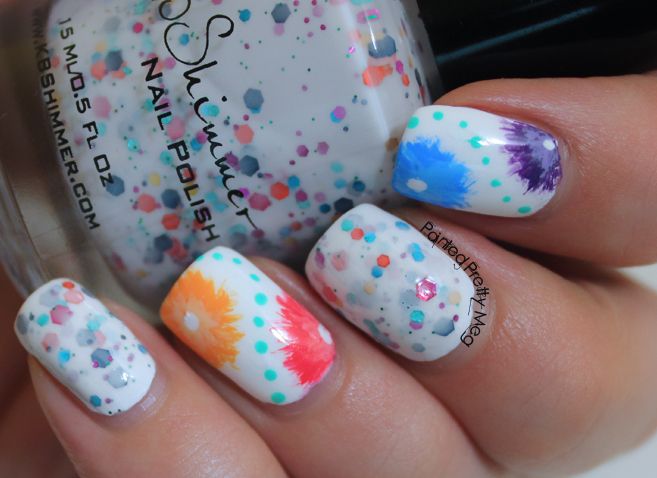
KBShimmer-Full-Bloom-Ahead-Swatch-with-Floral-Nail-Art-2


KBShimmer-Full-Bloom-Ahead-Swatch-with-Floral-Nail-Art-3


KBShimmer-Full-Bloom-Ahead-Swatch-with-Floral-Nail-Art-4


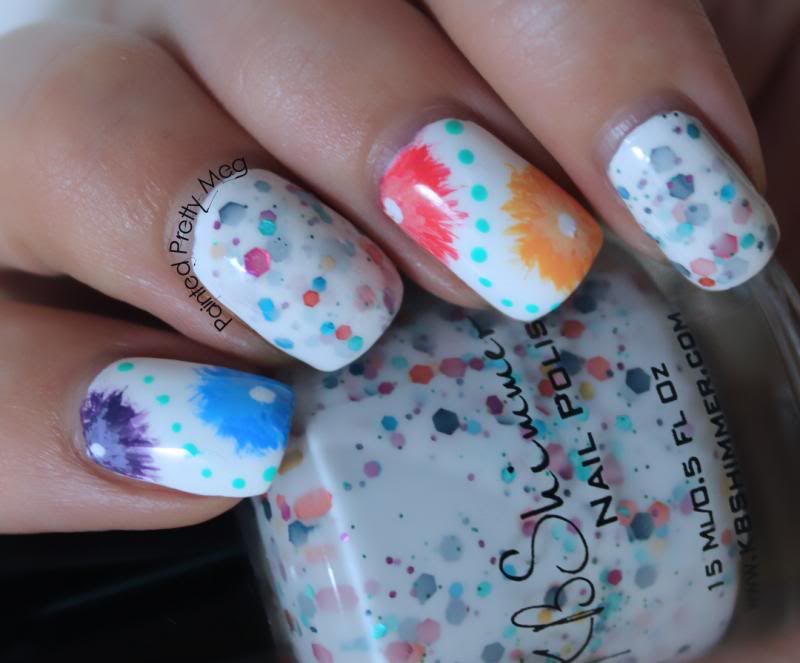
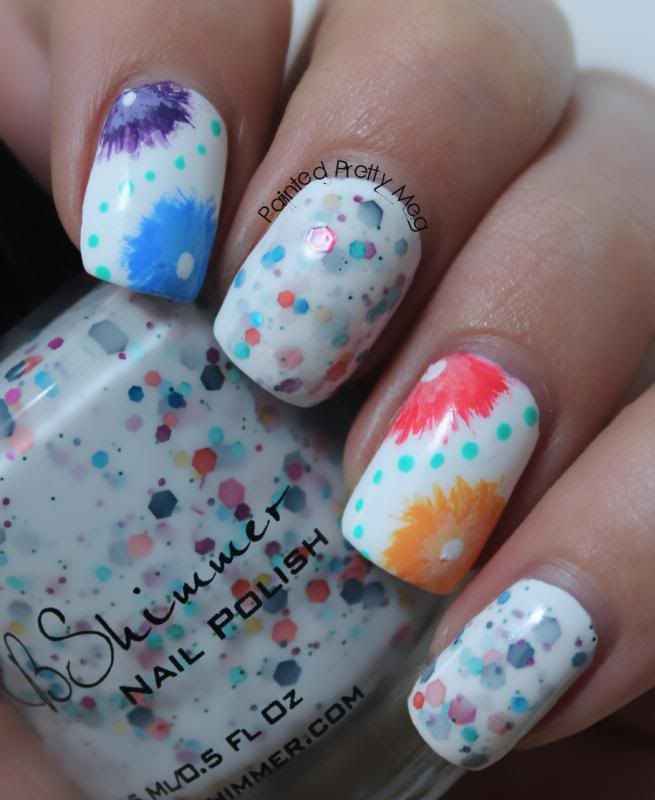
I am really proud of how these came out. They really remind me of the flowers from Alice in Wonderland that I loved so much as a kid. I paired these flowers with one of the new  KBShimmer spring shades Full Bloom Ahead, which is a gorgeous sister polish to KBShimmer Oh Splat!

 Full Bloom Ahead goes on smooth, and there is no fishing for glitters, although this is the norm when it comes to any KBShimmer shade, so I wasn't surprised it was a dream to work with. 

Now, for the flowers, this is where it gets a bit complicated since I used so many polishes. I started out with a base of Cult Nails Tempest, then once that was dry I painted the flowers onto the nail, using a nail art brush, and a dotting tool for the centre.  The dotted lines down the middle of each flower nail, was done in Picture Polish Chillax.  I will list the polishes  I used for the actual flowers below, since there were so many, I think trying to type them out here, would get a bit complicated. The first one, will be the outside darker colour, and the second will be the inside lighter colour. 

Polishes Used: 
                      Purple Flower - China Glaze - Grape Pop, China Glaze -Tart-y for the Party.
                      Blue Flower - Picture Polish  - Swagger, Julep Margaret
                      Red Flower - OPI  - Live.Love.Carnival, Picture Polish - Peaches n'Cream.
                      Orange Flower - Picture Polish - Totes,  Jessica Cosmetics - Banana Peel.


 Even though my freehand still needs some work, I feel I am learning a lot and getting better every day. Overall, despite it not being perfect, I really do love these and I am fairly certain I will be rocking these pretties for at least a few days.  Do movies ever inspire your nail art?  If so, what movies? Let me know in the comments! Till next time Kittens! <3
Wednesday, April 23, 2014

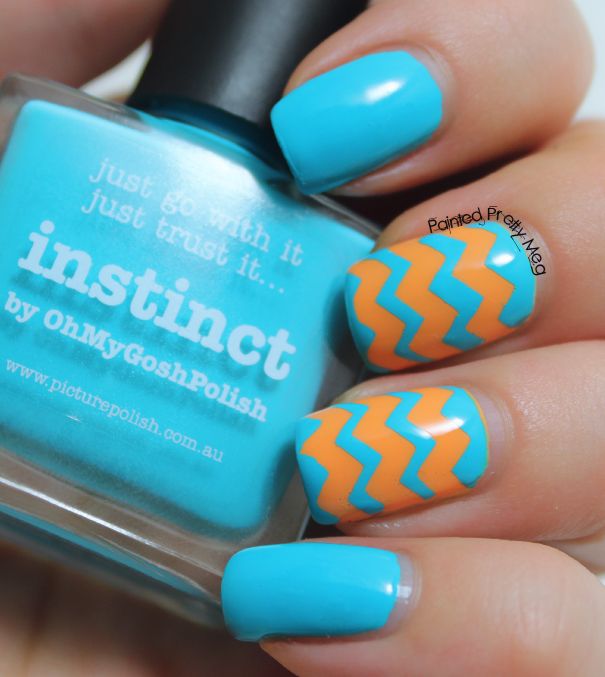
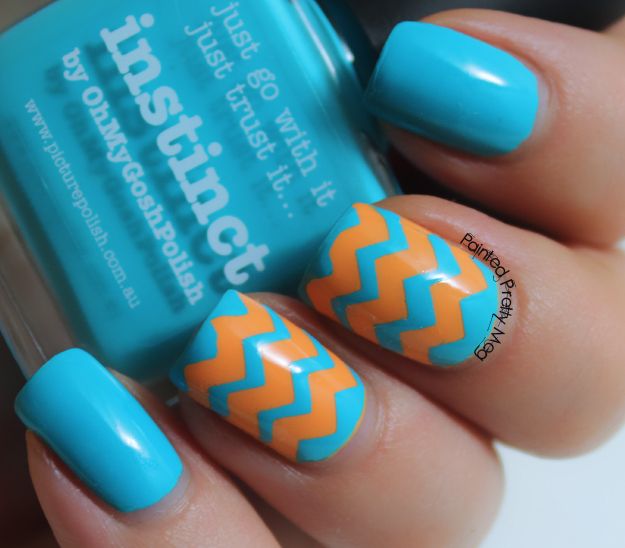
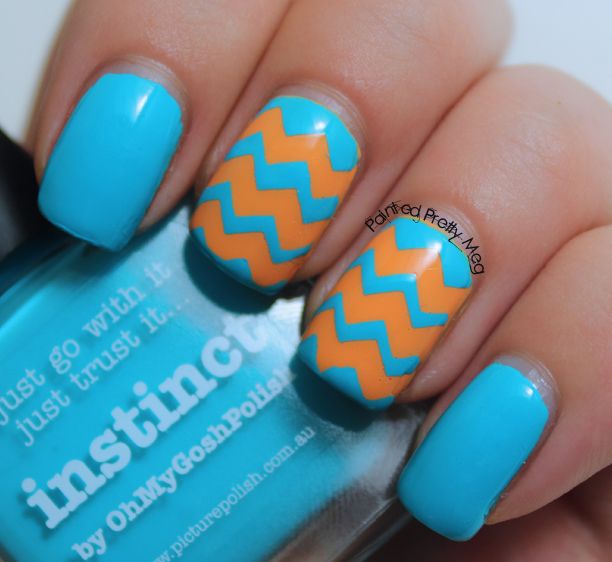
piCture pOlish Instinct with Some Totes Cute Chevrons!


Heya Guys!


This morning I have a simple, yet classic chevron look to show off. I am starting to think, it is my go-to choice in nail art, when I am feeling unsure about what I want to do, uninspired, or just  plain in the mood for a chevron! I feel like, you can never really go wrong with a chevron mani to be honest, and since I am still recovering from this horrible, icky, sinus infection, I went with something tried and true for me!


Picture-Polish-Totes-Swatch-with-Chevron-Nail-Art-1-Chevron-Nails


Picture-Polish-Totes-Swatch-with-Chevron-Nail-Art-2-Chevron-Nails


Picture-Polish-Totes-Swatch-with-Chevron-Nail-Art-3-Chevron-Nails


Picture-Polish-Totes-Swatch-with-Chevron-Nail-Art-4-Chevron-Nails


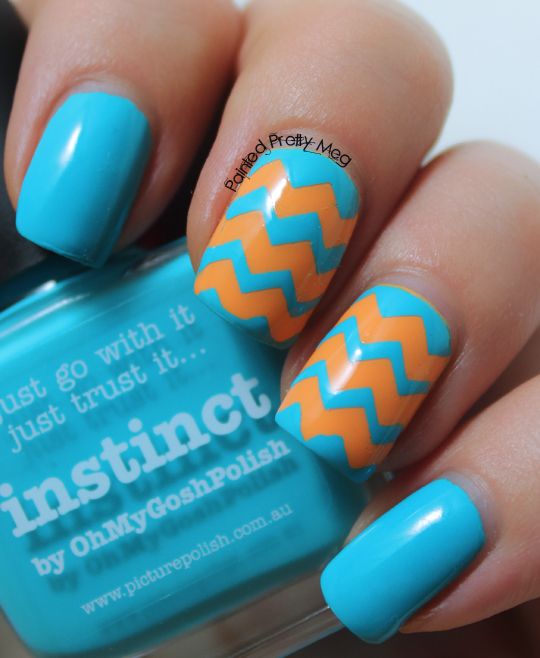
To get this look, I simply grabbed Instinct, which is the most recent Picture Polish collab shade with @ohmygoshpolish, It is a super pretty robins egg blue, that almost glows from within. I will admit, when I first got this polish,  I thought it was a glow in the dark polish, it is not. I misunderstood, it glows, but only under black light. I just wanted to share that, since I have heard a few people think it was also glow in the dark, anyway, I painted, my pointer, pinky, and thumb with Instinct. I  then paired it with another PP shade, I used Totes from the new Urban Shades Collection. Totes, is a warm yellow, almost orange polish, however when I paired it with the blue, it mostly just looked orange on me! It isn't quite as bright as my pictures show, but it did end up looking more orange then yellow, once I added the blue chevrons.  I painted my middle, and ring finger with Totes, then once that was dry, I grabbed some awesome sauce Nail Vinyls and painted over Totes, with Instinct. I then simply top coated with KBShimmer Clearly On Top, and voila! I had an easy peasy chevron mani!


I really love both of these shades, and although Instinct isn't entirely unique to my collection, it is a really gorgeous, easy to work with polish. Now, as for Totes, I am in love! It is a super easy to work with yellow/orange polish that went on the nail like butter AND it is super unique to my collection. I am still not even sure weather I should be calling it orange, or yellow! How about yelange?? No....yeah, that is pretty bad! sorry, I couldn't help myself :P Both polishes are worn with 2 coats, except the chevrons, that was 1 coat. Instinct honestly would have been okay at one coat on my other nails, I just did a second coat out of habit, it is a fairly opaque polish.


Alright guys and gals, I think that mostly covers it for one day! What is your go-to mani when you are stuck, or uninspired?  Let me know, in the comments! Till next time Kittens! <3
Monday, April 21, 2014

Colors By Llarowe: Bea Stings! for Easter!


Heya guys!


I really wanted to show you all what I threw together for Easter, this past weekend. I recycled  last week's mani  into a  cute, if unconventional, Easter mani. The reason I say unconventional, is because the colours, aren't your typical colours since they are a far cry from a pastel nail colours.


Colors-By-Llarowe-Bea-Stings!-Swatch-Easter-Nail-Art-1-water-decals


Colors-By-Llarowe-Bea-Stings!-Swatch-Easter-Nail-Art-2-water-decals


Colors-By-Llarowe-Bea-Stings!-Swatch-Easter-Nail-Art-3-water-decals


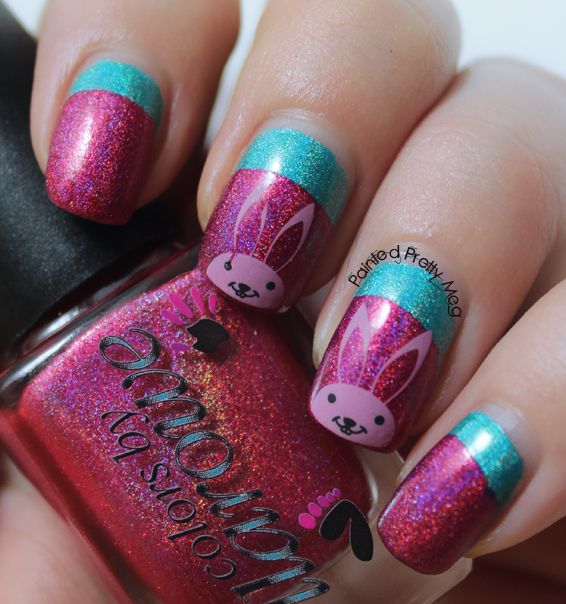
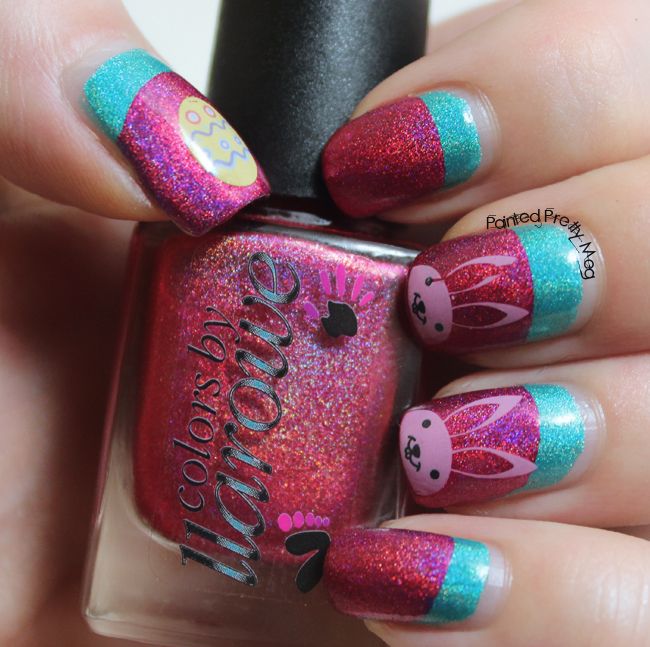
To get this look, I simply used Nail Vinyls, at the half moon section, and painted my nails in Bea Stings! by CBL. I honestly can't say enough good things about Bea Stings!, the colour is super rich, the holo is so intense, it almost looks like a rainbow flame on your nails. It is jaw dropping. It was a tad thick, but still super easy to work with. I honestly, have yet to meet a CBL polish that I don't love. It has very quickly become a favourite brand, and I can't seem to get my hands on enough of them. Once that was mostly dry, I took out the water decals, from Born Pretty Store, and placed them on the nail, then top coated with a quick dry top coat, and I was done!

Although this is not your typical colour scheme for an Easter mani, like I said before, I really love it. I think the different twist makes it stand out, and makes it a bit unique in a sea of Easter mani's. It was my way of celebrating since this year our household didn't do much for the holiday, flu's, a sinus infection (me), and a bout of pneumonia (my mother), kept everyone wanting to just relax and take it easy. I can say that finally we are both starting to feel like ourselves again and things should be back to normal in a few days, which I can honestly say we are both so ready for.

Alright guys and gals, I think that covers it for today. I really hope everyone had a great holiday, or if you don't celebrate, then a great Sunday. Till next time Kittens! <3
Thursday, April 17, 2014

Cirque Colors Cerrillos Swatch and Review


Heya Guys,


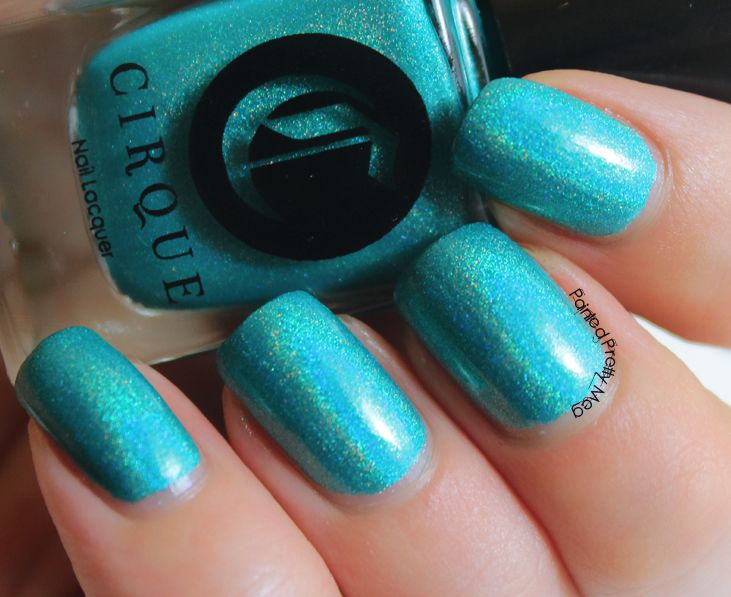
Today I have a gorgeous,  holo awesome, polish. Ever since I saw the first images of the Cirque Heritage collection, I started drooling. I fell hard for the gorgeous colours, the super cool names, and the intense rainbows. When they became available, I bought 5 of the 7 polishes from the collection, without even hesitating. They arrived yesterday, and I barely waited 10 minutes to try out the one I had been lemming the most. Cirque Cerrillos.

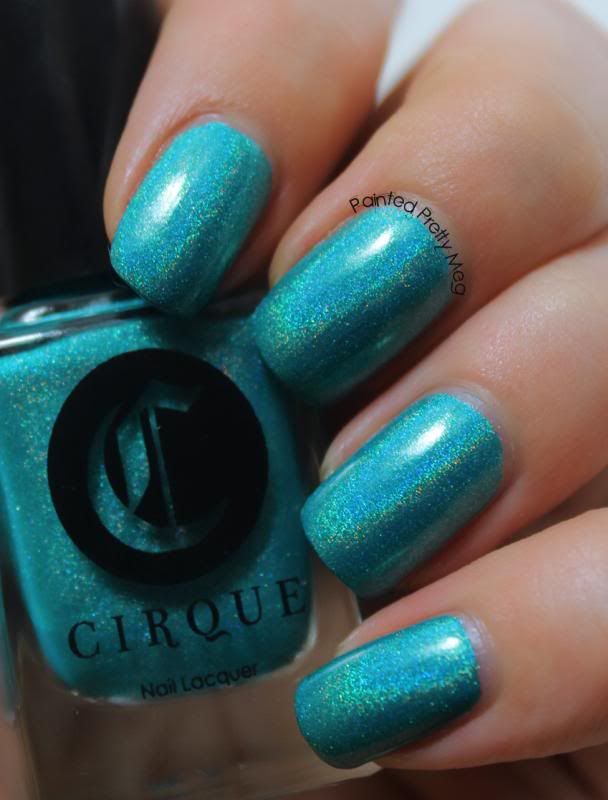
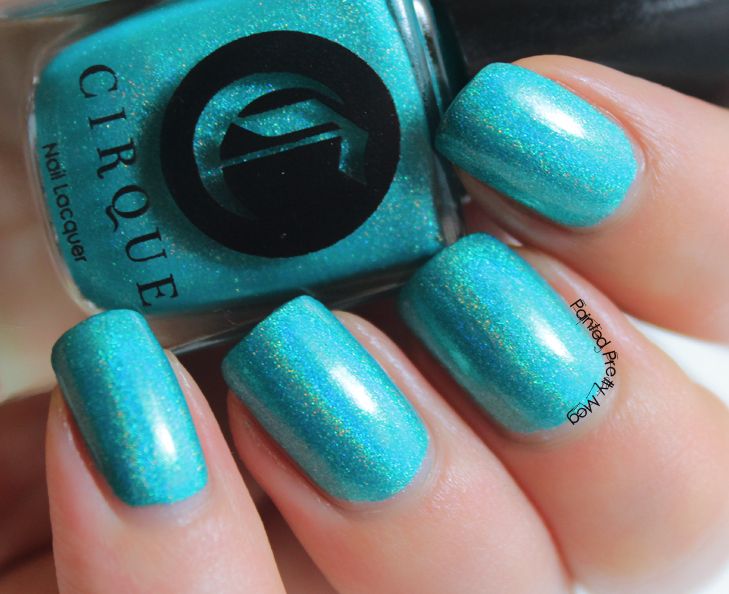
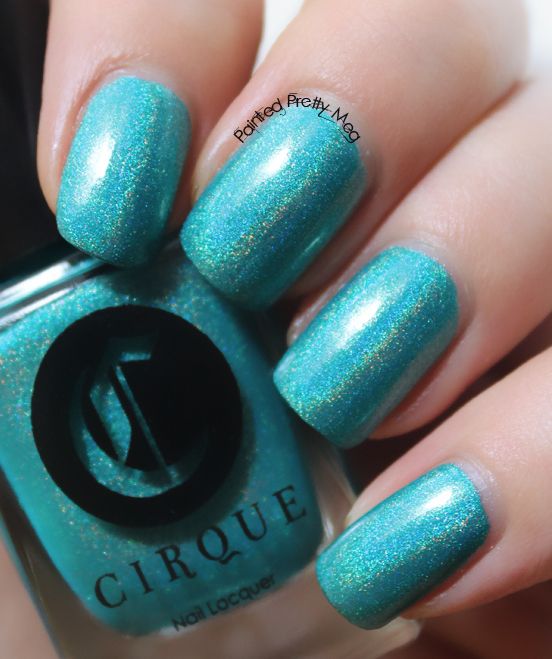
This is a gorgeous, turquoise holo polish, with a super strong holo effect, but what makes it so stunning, is that it has turquoise glitters mixed into the polish, so it gives it a glowly effect, when indoors, and adds to the rainbow effect outdoors. I will admit it, I am completely smitten, and now after only wearing one, I know I absolutely need the last 2 in my collection.


Cirque-Colors-Cerrillos-Swatch-and-Review-1


Cirque-Colors-Cerrillos-Swatch-and-Review-2


Cirque-Colors-Cerrillos-Swatch-and-Review-3


Cirque-Colors-Cerrillos-Swatch-and-Review-4


My pictures, lean a bit more blue, then it is in real life, and the holo doesn't come out in my lightbox near as strong, as it is in real life, but isn't that always the case with holos. Soon, here in Canadaland it will be summer, so some outdoor shots, with sunshine will be possible. :D  Also, I am not sure why, but for some reason, every picture I took, made my skin lean a bit on the orange side, which I can assure you, does not hold true in real life. I am not sure why my camera, was going a bit crazy, perhaps the awesome of this polish was just to much to handle! :P

The application is great, for this polish, 2 easy, quick coats, top coat and I was done. The top coat also didn't dull the holo effect at all, which is always something of a huge plus when it comes to a holo polish.  If you are into holo's this entire collection is definitely something you should check out!


Alright guys and gals, I think that mostly covers it for one day. I also wanna say a quick sorry, for being quiet all week, I should have queued up my posts a bit better last week, so as not to leave you all with nothing this week.  Either way, I hope you all are having a good week! 


Friday, April 11, 2014

Glam Polish: Pixie Hollow Collection in a Skittles Mani


Hiya guys!

 A little while back, I picked up some of the polishes in the Glam Polish Pixie Hollow Collection. I am really in love with these polishes, more so then when I had only seen swatches online. I think one of the best things, is when you have super high expectations for a polish, and then when you finally get your hands on it, it not only meets them, it surpasses them. Well, every one of these polishes from the pixie hollow collection so far, has done that for me!


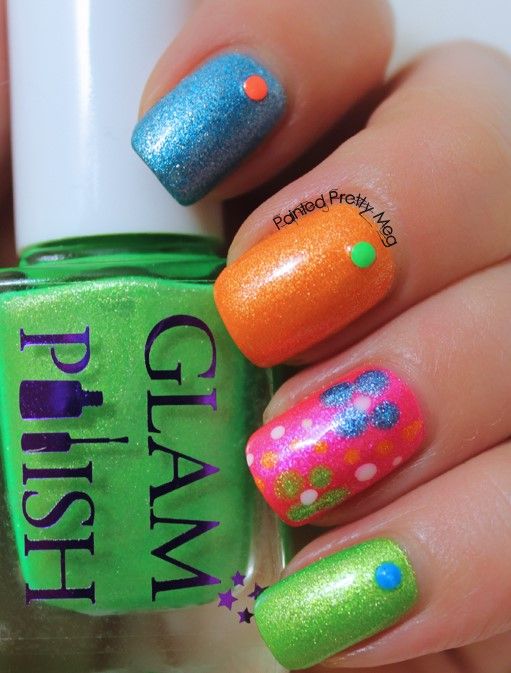
Glam-Polish-Pixie-Hollow-Collection-Skittles-Mani-Swatch-1


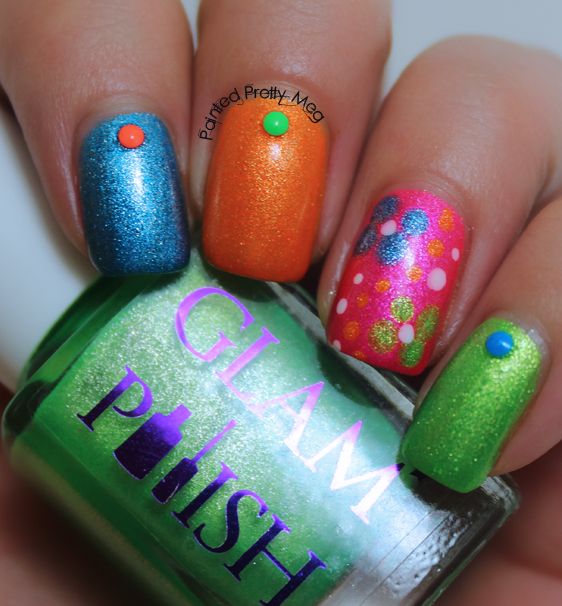
Glam-Polish-Pixie-Hollow-Collection-Skittles-Mani-Swatch-2


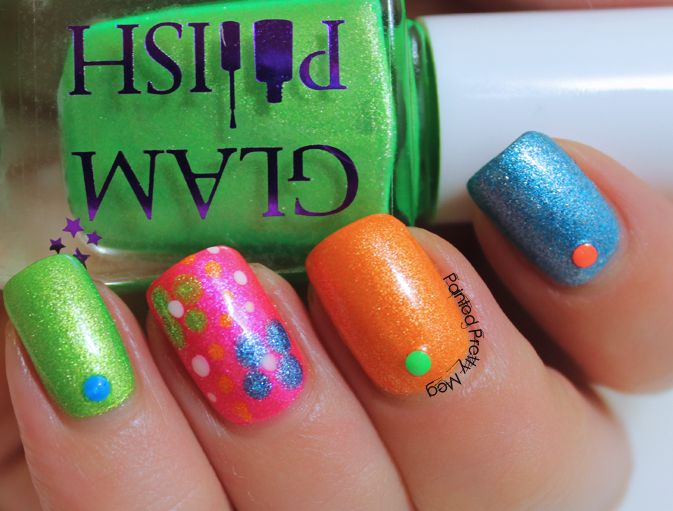
Glam-Polish-Pixie-Hollow-Collection-Skittles-Mani-Swatch-3

Glam-Polish-Pixie-Hollow-Collection-Skittles-Mani-Swatch-4


Glam-Polish-Pixie-Hollow-Collection-Skittles-Mani-Swatch-5


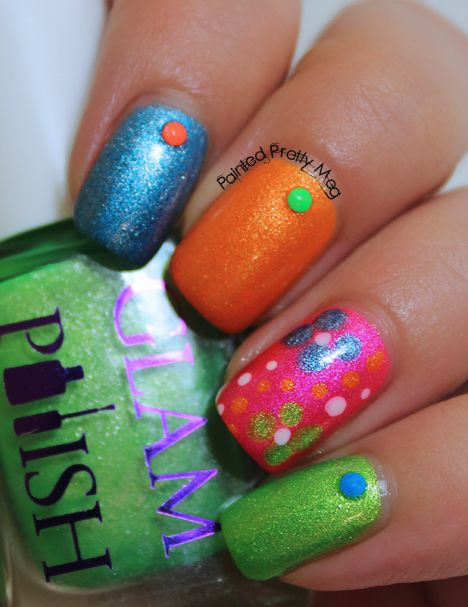
The bright colours in this mani, just makes me smile, every time I look at my nails! I am really big on colour, so these polishes almost feel like they were made for me! The silver shimmer in them, is just the icing on the cake, of  bright neon awesome!  The colours I used were, Silvermist (blue) Fawn (orange) Sweet Pea (pink) and Tinkerbell (green) and, I used dotting tools for the flowers on my accent finger, and thumb (which is not shown) and placed neon studs from Born Pretty Store in coordinating colours on all the other nails. Then I topped it off with HK Girl Top Coat, and voila! I was done! 

These all went on amazingly well, They are a tad thick, but nothing that isn't easy to work with, and with the heavy silver shimmer it is to be expected. They had a good dry time, and in all the pictures, it was 2 coats.  

I really adore how fun and bright and summery this look is, It may not be summer here yet, but it is coming, and polishes like these get me super excited for it! Alright, I think that is it for today guys and gals, I really hope everyone is having a great Friday, and I hope you all have an awesome weekend! Mine is filled with relaxing and movies and general lazy bum like behavior, since I am so ready for some down time, after the crazy few weeks I have had.  Till next time Kittens! < 3